REVIEW · BOSTON
Small Group Revolutionary Tour of Lexington, Concord, and Boston
Book on Viator →Operated by Boston Hidden Gems · Bookable on Viator
A day on the American Revolution route makes the story click fast. You start at Paul Revere’s statue, then follow the timeline toward Lexington and Concord, ending with big Boston moments like Bunker Hill. I especially like how the tour connects key sites in order, so you see cause and effect instead of a pile of monuments, and how the Old North Church lantern signal ties directly to what you later see in Concord.
Two other strengths: the stops feel purposeful, and the small group size (max 9) helps you hear the details without straining. One possible drawback is simply the pace: it’s a long 7-to-9-hour day packed with short walks and plenty of time on the move, so plan for a long, standing-heavy itinerary.
In This Review
- Key Highlights You’ll Care About
- A Revolutionary Day You Can Actually Follow
- Price and Value: What $225 Buys You
- Timing, Group Size, and Comfort on a 7-to-9-Hour Schedule
- Paul Revere Mall to Old North Church: The Lantern Signal Setup
- Following Paul Revere Toward Lexington Green
- Hancock-Clarke House: The Warning Point
- Lexington Green: First Shot, First Fracture
- Buckman Tavern: Waiting for the Redcoats
- Paul Revere Capture Site: The Turn Toward Consequences
- Concord’s Core: North Bridge, Hidden Supplies, and the Real Lantern
- Old North Bridge: The Shot Heard Round the World
- Old Hill Burying Ground: British Officer Views
- Concord: Lunch and Shopping Time
- Concord Museum: A Real Artifact Connection
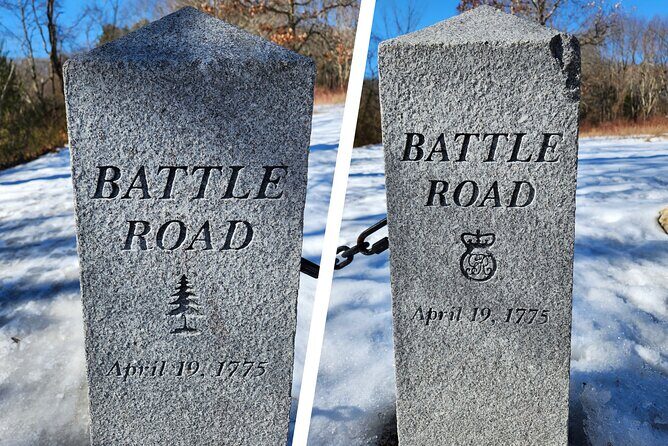
- Battle Road to Boston: Taverns, Washington, and Bunker Hill
- Hartwell Tavern and the Battle Road Trail
- Thomas Nelson Jr. House Site: Landscape as a Battlefield Clue
- Munroe Tavern: A British Field Hospital and Washington’s Link
- Cambridge Common and the Continental Army Command Moment
- Wadsworth House: Washington Living While Commanding
- Bunker Hill Monument: The First Official Battle
- What to Do About Lunch, Snacks, and the Practical Stuff
- Should This Tour Fit You?
- Should You Book This Lexington, Concord, and Boston Tour?
- FAQ
- FAQ
- How long is the tour?
- What does the tour cost?
- Where does the tour start and where does it end?
- What time does the tour start?
- Is lunch included?
- What admission tickets are included?
- Are there any included comforts or transport basics?
- What group size should I expect?
- Is the tour in English?
- Is cancellation free if I change plans?
Key Highlights You’ll Care About
- A timeline you can follow from Paul Revere’s signals through the first shot at Lexington and the events of Concord
- Old North Church to Concord Museum linkage: the lantern signal story is matched with a real lantern on display
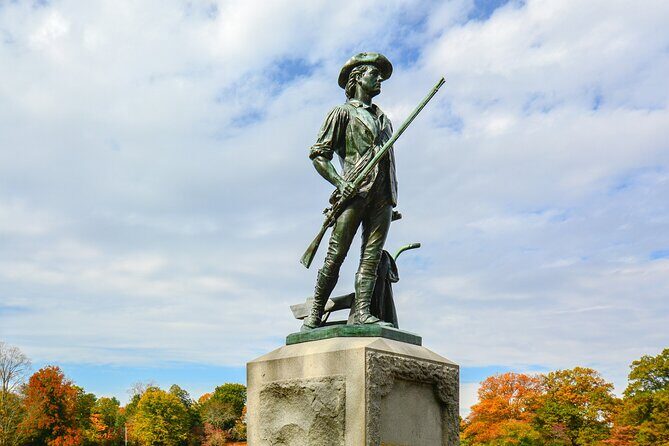
- Midnight Ride route, not just trivia: you’ll see the Lexington and Concord points tied to Paul Revere’s warnings
- Concord’s hiding-supplies angle told from the British officers’ perspective at Old Hill Burying Ground
- Battle Road sites plus Boston command moments with Washington-related stops near Cambridge Common and Wadsworth House
A Revolutionary Day You Can Actually Follow
If you want the American Revolution to feel real, this route helps you do it the easy way: by building it in order. You start where the story begins for Boston that night—the Paul Revere signal setup—then you work outward toward Lexington and Concord, and finally you circle back toward Boston and Cambridge for the bigger “what happened next” moments.
I like that it’s not just looking at signs. Each place is tied to what came right before it. That makes the first moments of April 19, 1775 easier to understand, and it makes the later battles feel less random. The best part is the practical storytelling. You get the timeline in chunks you can digest, not a lecture you forget by the next stop.
And yes, there are plenty of iconic names—Paul Revere, John Hancock, Sam Adams, George Washington. But what makes the tour satisfying is the way those names get grounded in specific sites you can stand near.
You can also read our reviews of more tours and experiences in Boston.


Price and Value: What $225 Buys You
At $225 per person for a 7-to-9-hour day, the value depends on one thing: whether you want guidance to connect the dots. If you’re the type who enjoys history when it’s explained in a simple, chronological way, this price starts to make sense fast.
Here’s what you’re getting that you’d otherwise pay for or work around:
- Admissions included at Old North Church and Historic Site, and at Concord Museum
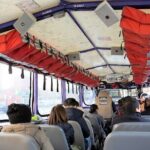
- A comfortable, air-conditioned vehicle (important on hot or changeable days)
- Parking fees and fuel surcharge covered, which saves you time and hassle
- Bottled water included so you’re not hunting for it mid-route
- Free time built in for lunch and shopping in Concord (lunch itself is not included, but the break is real)
What’s not included is also clear: lunch and snacks are on you. That’s normal for this kind of day tour, but it does mean you should plan food before you’re hungry and grumpy.
Overall, I’d frame the $225 as paying for transportation, expert guidance, and two admissions that can otherwise slow your day down.
Timing, Group Size, and Comfort on a 7-to-9-Hour Schedule
This tour typically runs 7 to 9 hours, starting at 10:00 am. Expect a steady rhythm: short stop, walk a bit, learn what matters, then move on.
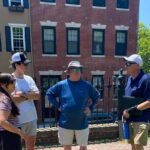
You’ll be in a small group (maximum 9 travelers). That helps in two ways. First, you can actually hear the guide without competing with a crowd. Second, the guide can keep the flow smoother when there’s a question that needs a quick answer.
Comfort is also handled in the basics: air-conditioned vehicle, bottled water, and a plan that includes drive-by moments in some areas. That said, the itinerary includes multiple stops where you’ll be outdoors or walking briefly. The overall guidance calls for moderate physical fitness, so wear shoes you trust.
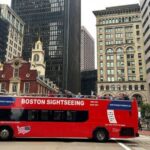
The meeting point is straightforward: you start at Paul Revere Statue, Paul Revere Mall in Boston. The tour ends at 600 Commercial St, Boston. And you get an extra bit of convenience: the guide can drop you off in the North End or at your hotel within 1.5 miles of the North End.
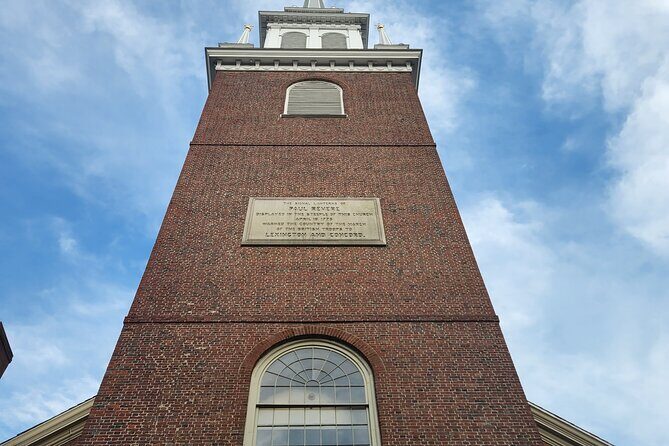
Paul Revere Mall to Old North Church: The Lantern Signal Setup
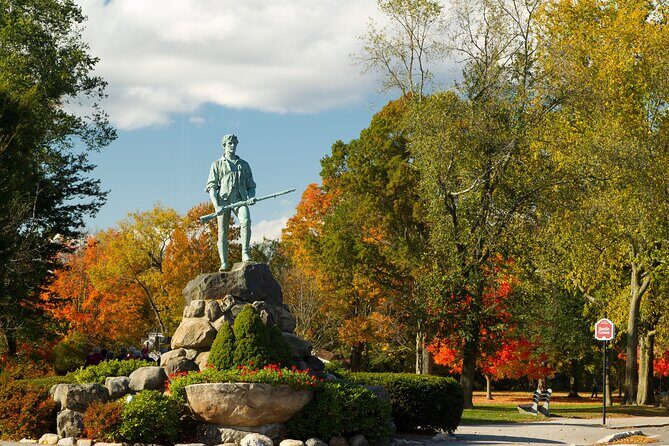
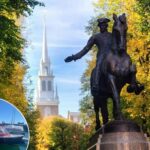
You begin at the Paul Revere Mall and the Paul Revere statue, with Old North Church as a backdrop. This is a smart opener because it anchors the whole day in the North End neighborhood vibe: Boston on the eve of the American Revolution, tense and watchful.
From there, you go into Old North Church and Historic Site, which is included with admission. The big story here is the famous lantern message—one if by land, two if by sea. It’s the kind of detail that sounds like a slogan until someone connects it to the situation on the ground. Once you hear the explanation, you can almost picture the movement and confusion that night.
Time is short (about 25 minutes), but it’s enough to understand why this church became a turning point. If you only remember one thing from this early stretch, make it this: the Revolution wasn’t just muskets and marching. It was also signals, timing, and nerve.
Following Paul Revere Toward Lexington Green
After the North End setup, the day widens out. The next major theme is the Midnight Ride—what Paul Revere did, who he warned, and how fast events escalated.


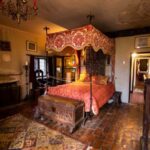
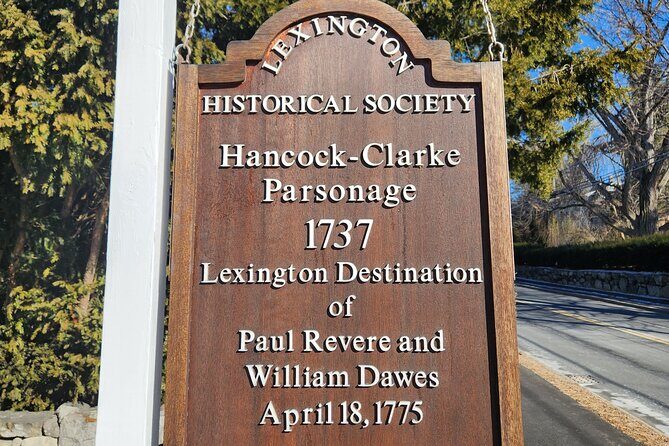
Hancock-Clarke House: The Warning Point
You’ll visit the Hancock-Clarke House and see the route out toward Lexington, including the actual house where Paul Revere warned John Hancock and Sam Adams about approaching British troops. This stop has a meaningful “this is specific” feel. You’re not just hearing about famous people—you’re standing near a physical location tied to their fear and urgency.
It’s also a stop designed to help you understand the logic of the moment. The warning isn’t abstract; it’s a chain reaction that leads to people preparing for conflict.
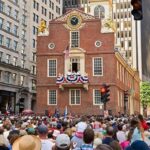
Lexington Green: First Shot, First Fracture
Next is Lexington Green, where you’ll explore the Battle Green and learn about what happened on April 19th, 1775, including the first shot of the American Revolution. Even if you know the date already, the guide’s job here is to explain the context—why both sides behaved the way they did and how the day spiraled.
This stop is about 25 minutes and is easy to enjoy even if you’re not a hardcore history person. It feels like a turning point you can picture.
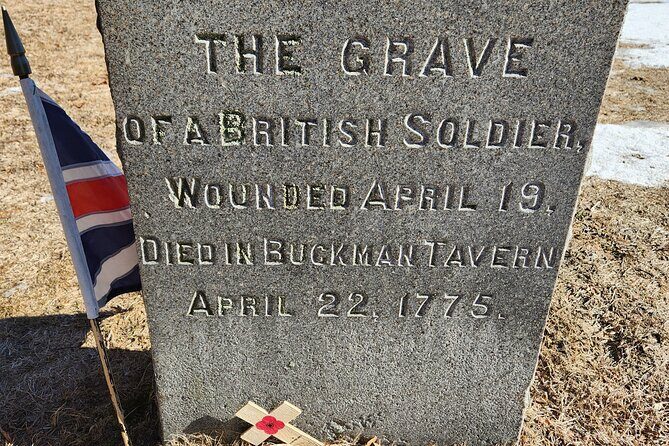
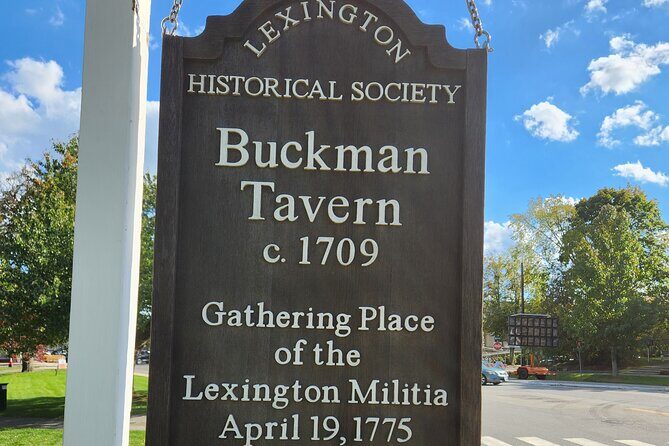
Buckman Tavern: Waiting for the Redcoats
You’ll make a quick stop at Buckman Tavern, described as a gathering spot for colonists awaiting the arrival of the British troops. This is one of those breaks in the story where the guide can explain what waiting looked like. Not just fear, but organization—people getting in place while they hoped the day might unfold differently.
It’s short (around 10 minutes), but it adds texture. It’s harder to treat the Revolution like a movie when you see taverns and meeting spots in the chain.
Paul Revere Capture Site: The Turn Toward Consequences
Then you head to the Paul Revere Capture Site, where you learn the real story of his Midnight Ride and see where he was captured. This stop matters because it shifts the tone. You move from “signal and warning” to “what happened after the warnings.”
That contrast is why this tour works. It doesn’t just celebrate a hero moment. It shows the cost of the ride and how quickly plans can collapse.
Concord’s Core: North Bridge, Hidden Supplies, and the Real Lantern
Once the tour reaches Concord, the stakes become clearer: the British are moving, colonists are reacting, and information (or the lack of it) shapes every step.
Old North Bridge: The Shot Heard Round the World
At the Old North Bridge, you stand in the place tied to the story behind the phrase the shot heard round the world. This isn’t offered as poetic wallpaper. It’s framed as a site where events escalated into something bigger than local fighting.
Time is about 20 minutes, so you’re not stuck in a museum line. You learn the key turning points, then you move on.
Old Hill Burying Ground: British Officer Views
You’ll also stop at Old Hill Burying Ground, where you’re told the town of Concord from the perspective of British officers. The guide includes the funny part too—stories about how Concord residents hid war supplies from being found. That humor is useful. It keeps the day human.
It’s a quick stop (around 15 minutes), but it’s one of those “you’ll remember this” scenes because it shows that people weren’t just passive victims. They used everyday tricks to survive the search.
Concord: Lunch and Shopping Time
Then comes free time in Concord—about 1 hour 15 minutes for lunch and shopping. Lunch isn’t included, so this is where you should decide what kind of break you want. If you’re the type who likes a sit-down meal, pick something early in the window. If you want quick and portable, grab food and walk it off for a few minutes.
This break is the tour’s pressure valve. Without it, the day would feel nonstop. With it, you can reset.
Concord Museum: A Real Artifact Connection
Admission is included at Concord Museum (about 45 minutes). The highlight is the real lantern that hung in Old North Church on the night of April 19th, 1775, plus preserved artifacts from the Revolution.
This is where the day truly “locks together.” Earlier you learn about the lantern signal. Later, you’re shown the physical object linked to that story. That reduces the odds that it all feels like background noise.
If you only do one indoor component today, this is the one.
Battle Road to Boston: Taverns, Washington, and Bunker Hill
The final stretch brings you back toward larger Revolutionary milestones—especially the pieces that connect Lexington and Concord to Boston and Cambridge leadership.
Hartwell Tavern and the Battle Road Trail
You’ll visit Hartwell Tavern and see the best preserved stretch of the Battle Road Trail. The guide explains the bloody retreat of the British from Concord. This part is valuable because it shows movement and pressure, not only moments of dramatic standing still.
You’ll spend about 20 minutes here. It’s a good pace: enough time to feel the route, not so long that you fade out.
Thomas Nelson Jr. House Site: Landscape as a Battlefield Clue
Next is the Thomas Nelson Jr. House Site, where you stand in a forrested area and take in the landscape of the battle. The stop focuses on the idea of retaliation after earlier casualties on Lexington Battle Green.
This is a shorter stop (about 15 minutes), but it adds a “why here?” layer. The physical setting helps explain why fighters could act the way they did.
Munroe Tavern: A British Field Hospital and Washington’s Link
You’ll drive by Munroe Tavern, used by the British as a field hospital and headquarters on April 19th, 1775. You also hear that George Washington stayed at the tavern on his commemorative tour of Lexington.
It’s only about 10 minutes as a drive-by, but the dual-use detail (enemy headquarters then tied to Washington’s later visit) creates a real sense of how places changed hands.
Cambridge Common and the Continental Army Command Moment
Next comes Cambridge Common, where you see the exact spot where George Washington first assumed command of the Continental Army. That’s a huge pivot in perspective. By this point, the tour isn’t just about April 1775—it’s about the formation of leadership and direction.
The stop is about 20 minutes. It’s short, but the subject is big.
Wadsworth House: Washington Living While Commanding
You then drive by Wadsworth House, where Washington lived for six months while commanding the newly formed colonial army out of Harvard University. Again, it’s a drive-by (about 15 minutes), so focus on the connection the guide makes: leadership didn’t happen in a vacuum. It happened in rooms and routines.
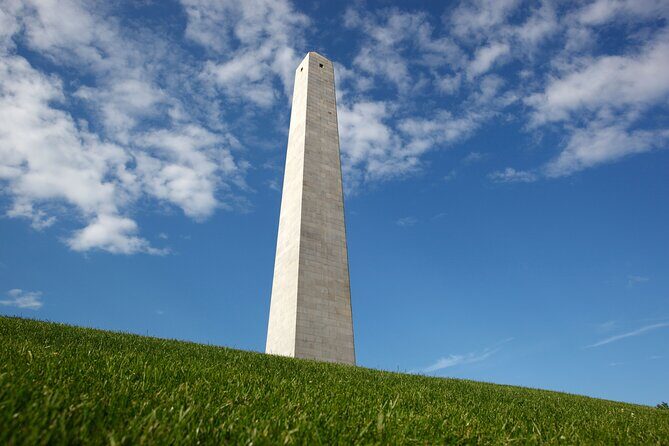
Bunker Hill Monument: The First Official Battle
Finally, you see Bunker Hill Monument and learn about the first official battle of the American Revolution. You’ll also hear the story behind dont fire until you see the whites of their eyes.
You get about 45 minutes here, which makes sense. This is the kind of place where you want a little more time to absorb and ask questions, not a quick camera stop.
What to Do About Lunch, Snacks, and the Practical Stuff
Because lunch and snacks are not included, I recommend treating food like part of your plan, not an afterthought. You have free time in Concord, but that window is time you’ll want to spend well. If you have dietary needs, figure out what works before you get stuck searching mid-tour.
Also pack like you’re doing a full day outside and on your feet:
- Wear comfortable walking shoes (the stops add up)
- Bring a light layer (Boston weather can change)
- If you like, bring a small snack so you’re not waiting for the Concord break
The good news is bottled water is included, and you’ll have transportation between key points.
Should This Tour Fit You?
This is a great choice if:
- You want the American Revolution told in a clear sequence from Boston to Lexington and Concord
- You like learning at historic sites with a guide, not just reading plaques
- You appreciate meaningful indoor time like Concord Museum (with the real lantern)
It may not be the best fit if:
- You prefer long free wandering with no set stops
- You dislike a structured day with a lot of brief scenes
- You’re hoping lunch and snacks are handled for you (they aren’t)
One more factor: with a small group of up to 9, it’s the kind of tour where you can actually ask questions and hear the answers.
And if your guide is named Jenny, you’ll likely get a storytelling style that makes the timeline feel meaningful and easy to follow—people consistently highlight her knowledge and ability to connect events in order.
Should You Book This Lexington, Concord, and Boston Tour?
If you want a guided day that makes April 19th, 1775 feel understandable instead of overwhelming, I’d book it. The mix of Old North Church, Lexington Green, Concord’s North Bridge and museum artifacts, and Bunker Hill gives you both the emotional turning points and the tangible objects tied to the story.
Just go in knowing it’s a full, structured day. Wear good shoes, plan your meals, and you’ll come away with a much clearer picture of how Boston’s signals became a revolution you can follow step-by-step.
FAQ
FAQ
How long is the tour?
It runs about 7 to 9 hours.
What does the tour cost?
The price is $225.00 per person.
Where does the tour start and where does it end?
It starts at Paul Revere Statue, Paul Revere Mall (Boston) and ends at 600 Commercial St, Boston.
What time does the tour start?
The start time is 10:00 am.
Is lunch included?
No. Lunch and snacks are not included.
What admission tickets are included?
Admission is included for Old North Church & Historic Site and Concord Museum.
Are there any included comforts or transport basics?
Yes. You get bottled water, an air-conditioned vehicle, and the tour includes parking fees and a fuel surcharge.
What group size should I expect?
The maximum group size is 9 travelers.
Is the tour in English?
Yes, it’s offered in English.
Is cancellation free if I change plans?
Yes. You can cancel for a full refund if you cancel at least 24 hours before the experience starts.